Before pairing your device, the country and language must be set.
You can restart the operation by going to the "My Account" menu, then select "Identify my device" and follow the instructions on the screen. Note: Bluetooth® must be enabled on your tablet or smartphone to complete pairing.
For Android smartphones or tablets, it is necessary to have the latest version of the system installed. To check your version, go to: "Settings" > "About" > "System Update".
To pair your device with Android: • Get closer to your device.
• When a message appears on the screen of your device, validate the connection request by pressing OK. Depending on the model of your Android smartphone or tablet, 3 types of messages are possible: - Auto-match: there is no need for validation, your device will connect automatically. - The message "Bluetooth connection request" will appear on your screen: simply click on "CONNECT", there is no need to enter a passcode. - A notification appear at the top of your screen: drag the screen down then click on the notification to display the message "Bluetooth connection request". Then click on "CONNECT", there is no need to enter a passcode.
• Press the OK button on your device again.
• A final message confirms that the connection is successful: your device is now connected!
• Check that your tablet or smartphone is compatible (see compatibility FAQ). • Check that Bluetooth® is enabled on your tablet or smartphone. • Check that your device has the "connect" feature and ensure it is activated, as follows: 1. Go to the "Settings" menu 2. Select the "Connect" menu NB: if you do not see a "Connect" menu, this means that your device is not equipped with the "Connect" option and it therefore cannot be connected to a tablet or smartphone. 3. Select "ON" If you have already paired your tablet or smartphone to your device, the connection will be made automatically. If not, please refer to the FAQ "How do I pair my app to the device?".
The blue light means that your device is a "Connect" model that can be connected to a tablet or a smartphone via the app.
• The light is flashing: the device is not connected to a tablet or smartphone. • The light is not flashing: the device is connected to a tablet or smartphone. • The light is off: the product's "connect" feature is disabled.
Another smartphone or tablet is already connected to the Cookeo. In this case, you need to disconnect it by closing the application or pressing "connected" in the top right corner of the application. Once the Cookeo's blue light starts flashing, you will be able to connect your device.
An Internet connection is required only to download and update the application, and sign in to my account. An Internet connection is not needed to use the connected feature of your product. There is no need to move your product closer to the access point (Internet router).
This means that the product's "connect" feature is deactivated. To reactivate it: 1. Go to the "settings" menu 2. Select the "Connect" menu 3. Select "ON"
If the connection between your appliance and smartphone/tablet is lost during a recipe, the two devices will be automatically synchronized as soon as the connection is re-established. You will be able to resume your recipe at the step you were on when the connection was lost.
If you wish, you can pair multiple devices as long as you only use one account on your app. To do so, pair each device independently. However, only one device can be connected at a time.
Place your appliance on a flat, stable surface. For the best connection between your appliance and smartphone/tablet, we recommend performing all operations requiring a connection at a sensible distance. If the connection is lost (connection symbol crossed out), move your device closer until the connection is re-established. If the connection indicator is lit (app or product), your devices are connected.
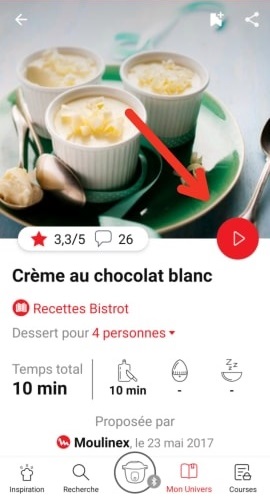
To download a recipe, you just need to launch the step-by-step process of this one while being connected to your device. A "Recipe download in progress" notification should appear and the download of the recipe from the device will begin.
Once the download is complete, the step-by-step will start in synchronization with your device.
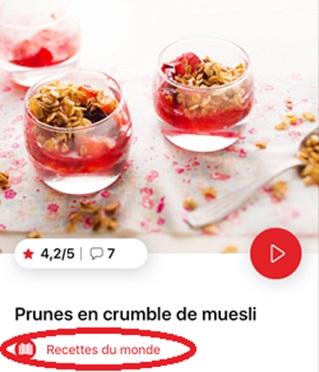
Recipes shared by users cannot be uploaded to your appliance. However, they can be made in manual mode by following the step-by-step instructions from the app.
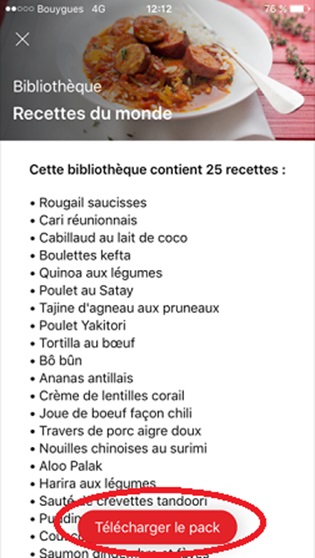
However, a selection of the most popular recipes from the community are converted by the brand to make them transferable/downloadable to your appliance. Feel free to rate/comment on your favorite recipes in order to give them a better chance of becoming connected!
When you turn on your appliance, the blue light flashes (waiting for connection) unless you have manually disabled the connect function.
When using your appliance for the first time, pair it with your tablet/smartphone by following the instructions on your screens, for example, when you step through a recipe.
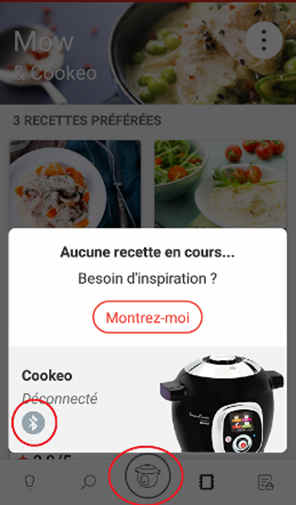
Alternatively, you can press the central button of the app (central menu icon), then the Bluetooth icon that appears, and follow the instructions on the screen.
1. First try turning your phone's Bluetooth signal off and on again by going through your phone settings or the shortcut bar (top of the phone on Android, bottom on iOS) then return to the app and repeat the pairing operations.
2. If this is not working, you can try turning off and on your phone or tablet and then restart the app and pairing again.
3. If the above steps have not been successful, then you will need to disconnect your device from your tablet/mobile.
On Android: • Go to Settings on your smartphone, then go to Connections, Bluetooth. • If you find a device labeled "Blue Cookeo" there, press the wheel and click "Dissociate".
On iOS: • Go to Settings on your smartphone, then to Bluetooth. • Make sure that the Bluetooth on your iPhone/iPad is enabled. • If you find in "My Devices" a device named "Blue Cookeo", press "i" then "Forget this device".
4. Reset your device's Bluetooth pairing table: • Turn off your device. • Press the back button on your device while turning it on. • When starting the device, quickly press the OK button 5 times while holding down the back button. • A "Enter Code" white screen appears, use the wheel to enter the code 8127 (by pressing OK between each digit). • Turn the device off. • Switch the device back on and try to pair it again with the tablet or mobile phone.
You must create an account and log in to your app to access these features.
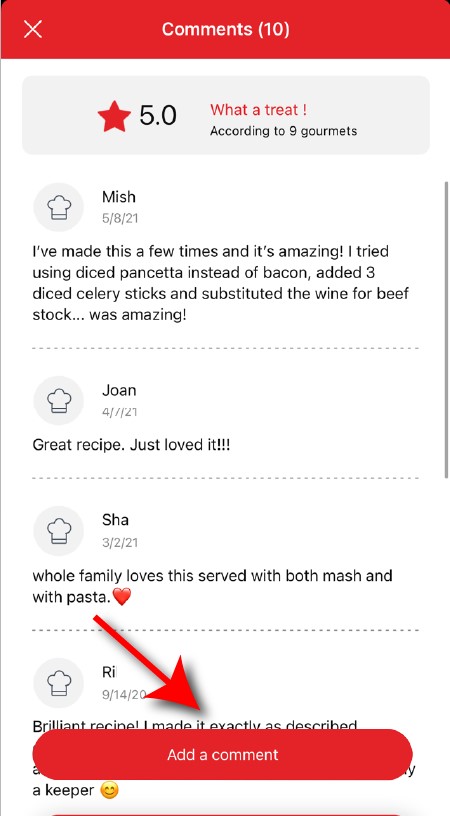
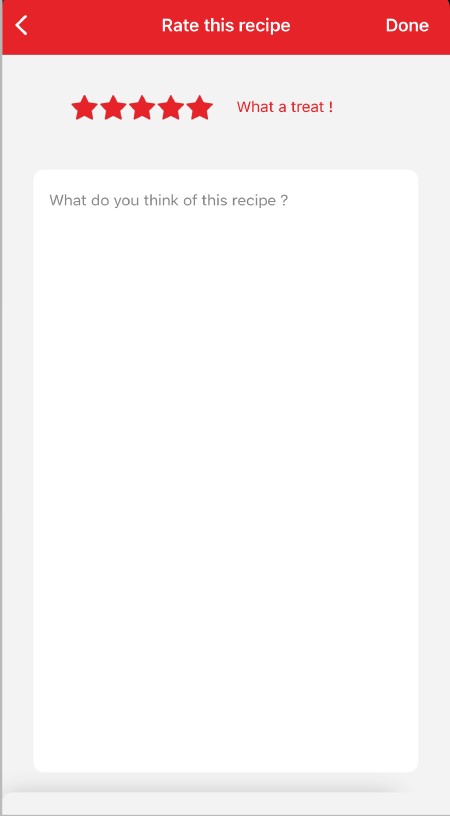
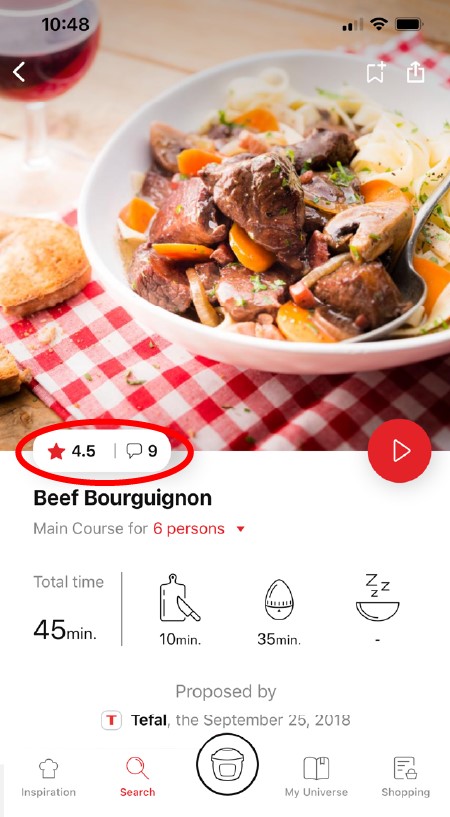
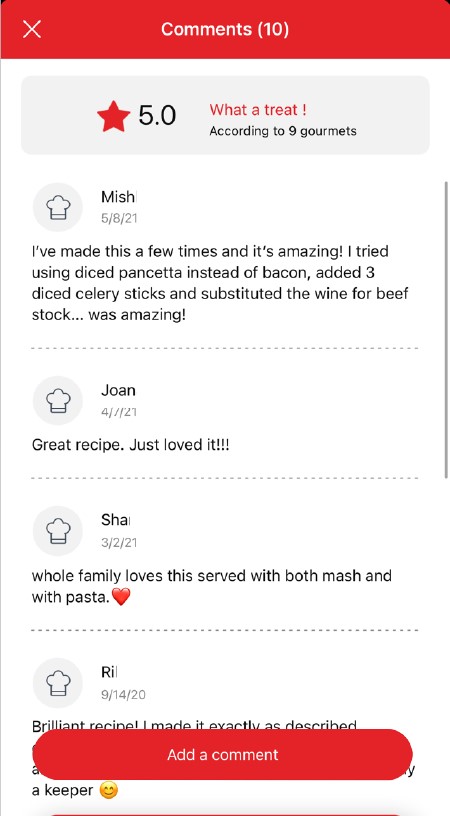
Once logged into your account, you will be able to rate the recipe and add a comment by following the instructions that appear on the screen after clicking on the notes/comments space.
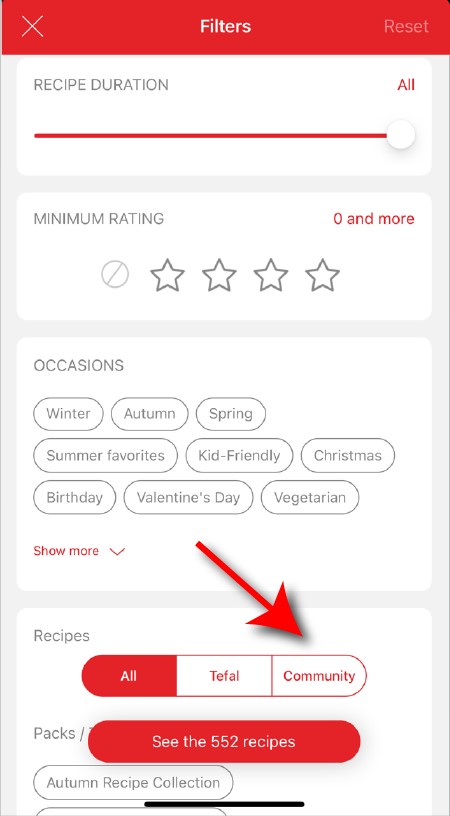
When using the search function, select "Filter recipes". In the "Recipes" section, select "Community" only. You will then be able to see the recipes from the community.
Once you have completed your search, specific filters make it easier for you to find the recipes that meet your needs.
The customizable filter: • Click on "Filter" in order to sort the recipes according to the type of dish (starter, main course, dessert), the time it takes to make the recipe, the minimum rating, their themes (or packs)... • You can also choose to select only the recipes of the brand or the recipes proposed by the community.
Sorting recipes: Once you have made a search, you can sort your recipes by popularity, rating, age or alphabetical order.
You must create an account and log in to your app to access these features.
Once logged in, you will be able to read the comments and see the notes that community members have given to the recipe by clicking on the notes/comments area.
Make sure that no identical recipe already exists on the app, otherwise your new recipe will be rejected by the administrator. We will not validate a recipe from another author that has been copied from a website or blog.
Be careful, it is forbidden to use a photo from the Internet or a book. You must take a photo of your recipe's result in order to be able to deposit and share it. Your recipe will be rejected if the photo is found on the Internet and you are not the original author.
Avoid abbreviations of words as much as possible and avoid using too familiar language, local expressions... To be well understood by everyone, regardless of their location!
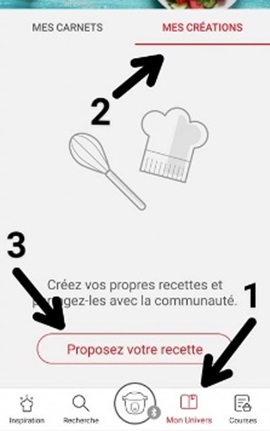
You must create an account and log in to your app to access this feature.
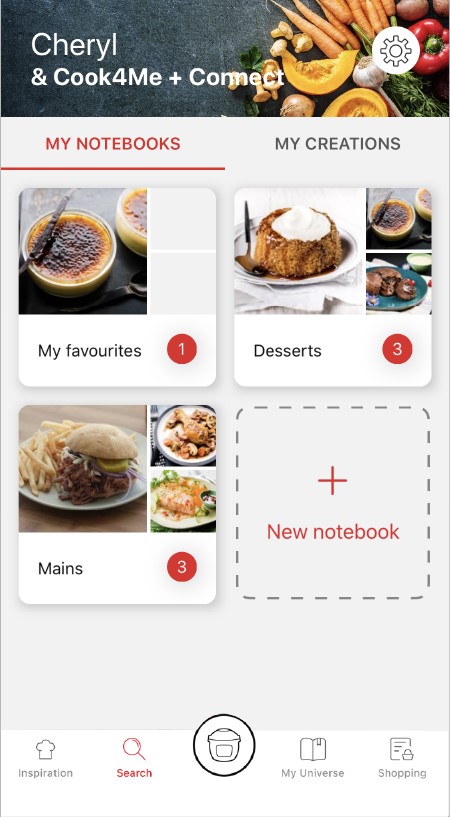
• Choose the "My Universe" tab in the navigation bar. • There, you will find your recipe booklets and can create new ones by clicking on "New booklet".
When you publish the recipe after you have entered it, it is checked before it is visible in the app. A delay of about 48 to 72 hours is therefore necessary before you find it on the app. A confirmation email will be sent to you notifying you of the validation or rejection of your recipe.
Choose the "My Universe" tab in the navigation bar, then select the booklet you wish to modify or delete. Click on the pencil at the top right of the screen, then select the action you are looking for ("Delete booklet", "Rename booklet" or "Delete recipes").
The app is no longer compatible on Android versions 4.4.4 or lower, because of reinforced data security.
As far as possible, we recommend that you update your device to a higher Android version or use another compatible device.
Updates will not only allow you to enjoy a richer experience with new features and compatibility with the latest technology, but will also protect you against possible security vulnerabilities that have been fixed in the latest versions.
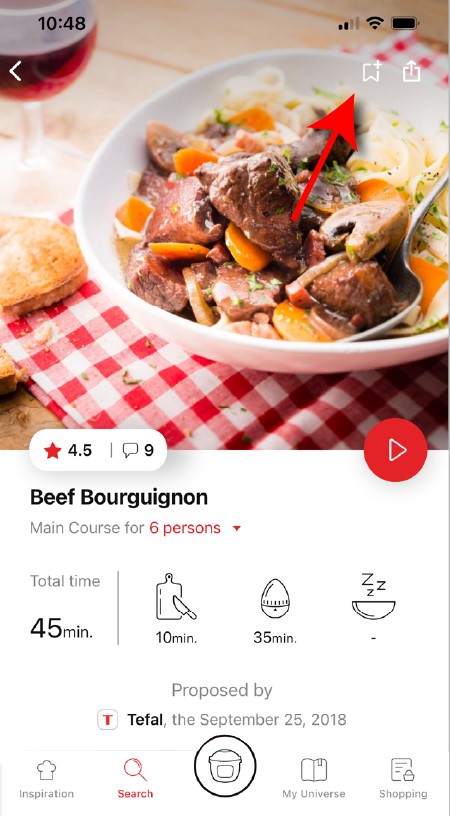
You must create an account and log in to your app to access this feature.
• Go to the recipe you wish to bookmark and select the bookmark logo in the top right corner. • A "My Notebooks" tab appears: select the "My Favorites" location. • The recipe has been added.
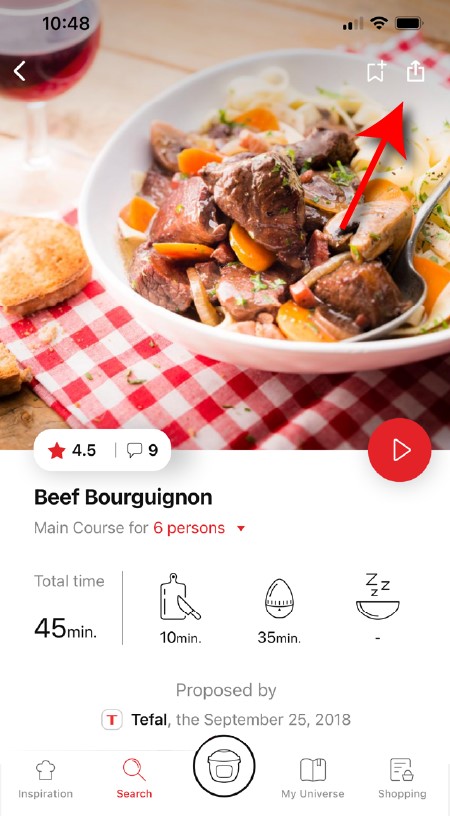
You need to create an account and sign in to the application in order to access this feature. Click the sharing logo to view the sharing options. You can then choose how you would like to share this recipe.
The application has rich content and requires a stable Wi-Fi connection to download correctly. If your application does not download correctly, delete it and try to download again when you have a more stable Wi-Fi connection. During initial installation, the download may take several minutes while the application saves all the photos on your Smartphone or tablet.
Your application uses notifications to alert you at the end of cooking times using a beep. If you want to turn off this signal, simply deactivate it in your tablet or Smartphone. You may also disable sounds in the parameter settings for notifications on your telephone or tablet.
Your application uses notifications to alert you when your cooking is finished but also to let you know when new content (information, recipe...) is available. If you wish, you can disable them from your smartphone settings.
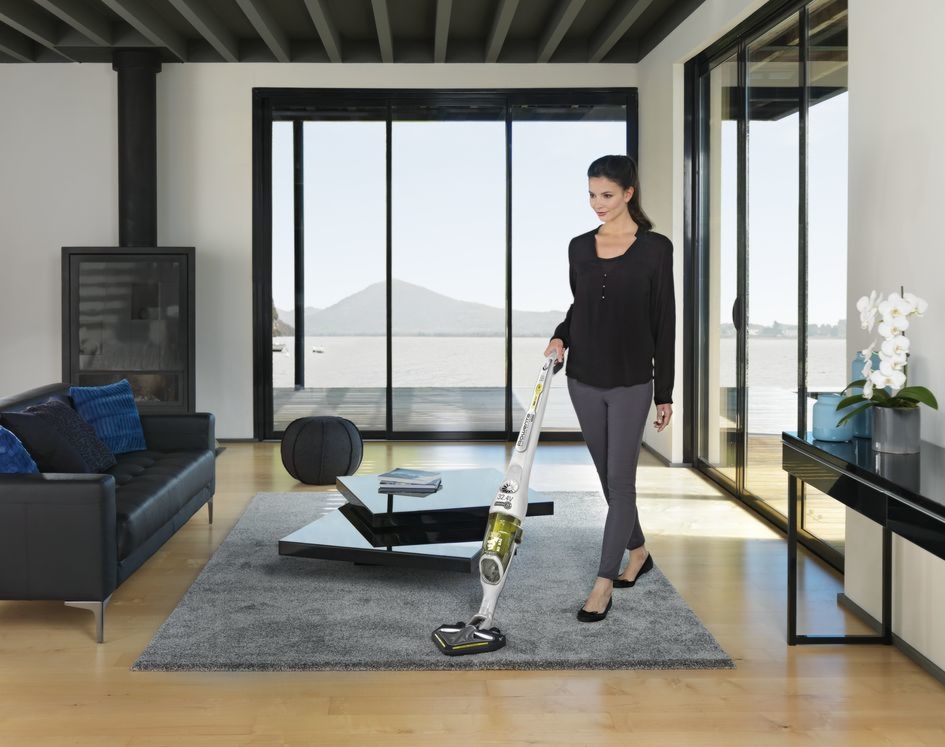
Your appliance can be used without the app. However, only the app will enable you to benefit from the many advantages available when your product is connected.
It is important to select your product in the app in order to find the right recipes for that product. This way, the app will suggest hundreds of ideal recipes. It will also let you add your accessories and access the associated recipes.
• In "My universe", select "My profile". • Click on the image of the registered product. • Click on "Remove the product". The app will then ask you to select a product.
First connect the cord to the device and then plug it into the power outlet. Make sure that the power cord is properly connected to both the device and the power outlet.
Make sure that the device is installed on a flat, stable, dry and heat-resistant surface. Depending on the model, you can choose your country and language.
• Wheel: You can switch from one menu to another by turning the wheel and enter the menu of your choice by pressing the button on the wheel. • Back/Cancel Button: A short press on the Back/Cancel button allows you to return to the previous step. • A long press (3 seconds) on the Back/Cancel button allows you to reset a function at any time.
• The filling level of the bowl must never exceed the MAX level. • For food that may expand during cooking (rice, seeds, lentils, peas, etc.), do not fill the bowl beyond half its maximum capacity. • The bowl should always be filled with a minimum of 200 ml of liquid. • When the timer reaches 0 and the following screen appears, you will notice a release of steam at the back of the lid during the decompression phase.
! Don't put your hands near the steam exhaust! It is possible that a slight flow of steam may escape from the back of the appliance during cooking.
• The required amount of water varies depending on the recipe and cooking time. • Always use a minimum of 200 ml of liquid. • Place the steam basket in the bowl and make sure that the food does not touch the lid. • When the timer reaches 0 and the next screen appears, you can see steam coming out of the back of the lid.
! Do not put your hands near the steam exhaust! It is possible that a slight flow of steam may escape from the back of the appliance during decompression phase.
Once the cooking cycle is completed, the appliance automatically switches to "keep warm" mode. The maximum duration of this mode is 5 hours. After 5 hours, the appliance will go into standby mode.
For some recipes, a delayed start is possible: "Manual menu and ingredients". To avoid the appearance and proliferation of bacteria, it is strongly advised not to use the "delayed start" mode with foods that cannot be kept at room temperature, such as meat, fish, dairy products or eggs.
When choosing delayed start, you must set the current time and the time you want your recipe to be ready. The recipe sequence is then the same as for an immediate start. The delayed start is only available in the "manual cooking" and "ingredient cooking" modes for certain ingredients only.
This function is not active in all modes or for all preparations. It is deactivated by the device for the preparation of programmed recipes containing fragile ingredients such as milk, fish, meat or eggs (see manual). Only possible with some ingredients such as rice, cereals and vegetables up to 15 hours in advance. These are health requirements to avoid possible undesirable bacterial growth.
Once you have finished cooking your dish, unplug the appliance for cleaning. Clean the appliance after each use.
You can clean the cooking bowl and steam basket with hot soapy water or in the dishwasher. Clean the body of the appliance with a damp cloth. After several times in the dishwasher, the outside of the cooking bowl may become whitish. You can clean it with the scraper on your sponge.
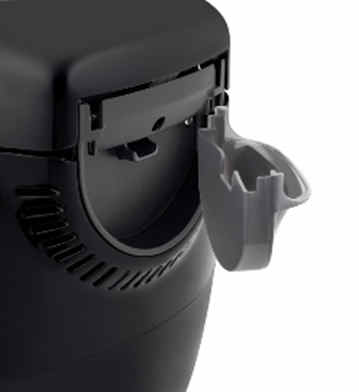
After each use, remove the condensation collector and clean it thoroughly with clean water or in the dishwasher. Take care to dry it well. Then put it back in its original position.
To clean the metal lid by hand or in the dishwasher, you must remove it and the valve cover: 1) Unscrew the nut in the center of the metal lid. 2) Remove the metal lid. 3) Remove the valve cover.
Before reassembling the ball, check that the duct is not obstructed by blowing into it.
Press on the inner part of the spring loaded safety valve to check that it is not clogged.
Clean the gasket with a damp sponge and rinse thoroughly. Do not use sharp objects. Replace the gasket at least every 3 years. This should be done at an Authorised Service Centre.
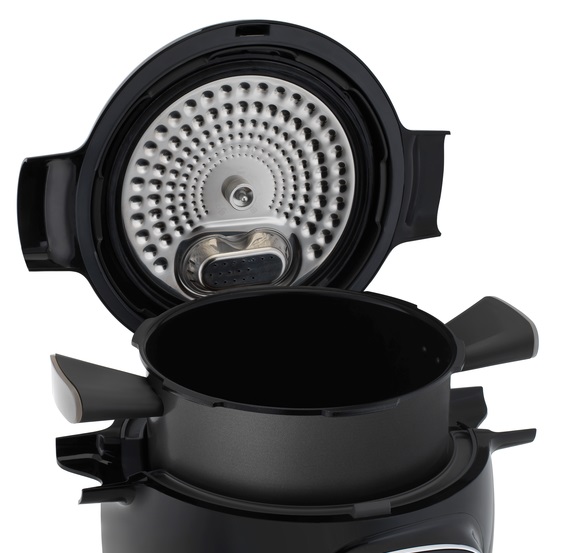
Before reassembling the inner lid, clean the upper part of the cooking bowl with a damp cloth. Clean the inside of the metal lid of the appliance with a damp sponge and check the locking rod housing (float valve) to ensure that it is not blocked. Rinse under water and check that the locking rod can move freely.
The locking rod can be disassembled for cleaning by removing the small silicone gasket and turning the metal cover over to remove it.
• It may be that part of the lid is not positioned properly. • Apply pressure to the probe in the centre of the central nut to release the lid. • Ensure that the cover of the decompression ball is in the correct locked position.
After each use, allow the appliance to cool, then dismantle the cover and its components (valve cover, ball cover and ball) then clean with soapy water.
Before reassembly, move the valve to ensure that it is working correctly, and check that the vent below the ball is not obstructed.
• Check that the opening handle is in the open position before moving the lid to the closed position (open padlock). • Check that the nut of the metal lid is quite tight. • Check that the violet ball cap (located on the top of the metal lid) is in the correct locked position (closed padlock). • If you are at the end of cooking and you want to close the lid, wait until the hot vapours have dissipated before closing the lid. • Check for foreign bodies between the bowl and the heating plate. Remove the bowl and check that the heating plate, the central element and the underside of the bowl are clean. Also check that the central element can move freely. • The bowl may be deformed (after an impact, fall...). The bowl must be changed at an authorised service centre.
• Check that you are not cooking. • Unplug the product and wait until it cools completely. • Once the product is completely cool (total absence of internal pressure), insert a rod into the hole located between the opening handle and the silent valve.
• This is normal, the odour will disappear completely after a few uses. • Be sure to thoroughly clean the items listed in the instructions: cooking vessel, metal lid, before re-using your appliance.
• In the settings, select "Screen/Sounds", then "Screen", "Demo Mode". • Turn off the demo mode. • Enter the code 3424 using the scroll wheel. • Press OK. • Your device will reboot and return to normal mode. The "Demo" logo has disappeared and your device is ready for use.
• The quantity of water in the tank is insufficient to increase and maintain the pressure throughout the cooking. • Stop the ongoing process, open the lid and add a sufficient quantity of water. Restart the recipe or re-heat manually. • Our tip: When cooking rice and other foods susceptible to high water absorption during cooking, check the instructions on the food packaging carefully and add the minimum amount of water required for cooking under pressure (up to 200ml for maximum quantity/long cooking time).
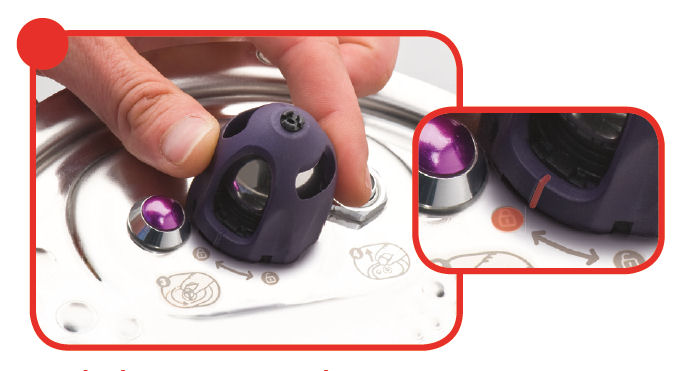
Your ball cover might be incorrectly attached. Let the product cool down completely, then remove the metal cover and check that the vertical marker on the ball cover is opposite the icon showing a locked padlock. If the problem persists after this check, take your product to one of our approved repair services.
Your ball cover might be incorrectly attached. Let the product cool down completely, then remove the metal cover and check that the vertical marker on the ball cover is opposite the icon showing a locked padlock. If the problem persists after this check, take your product to one of our approved repair services.
Check with the help of the user manual that all parts of the inner metal cover are present, securely in place and clean and that the metal cover is sufficiently screwed on.
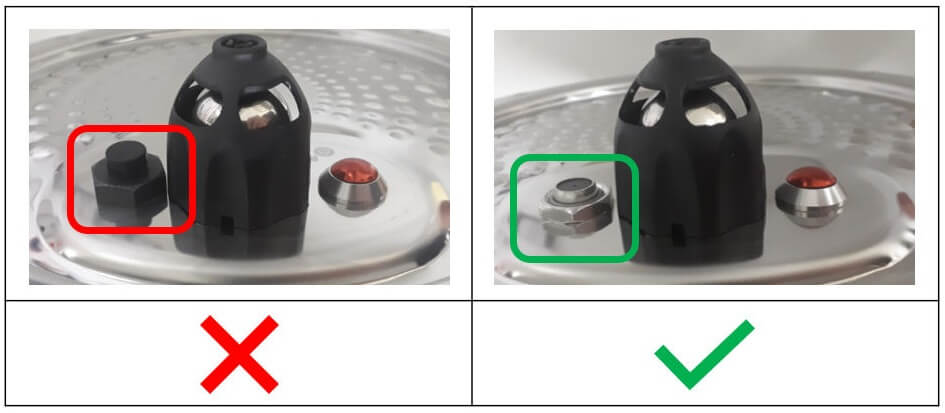
Make sure that the locking rod is not mounted upside down. The magnetised part of the locking rod must be on the same side as the ball and the locking rod seal on the opposite side of the ball.
Check that there is sufficient water in the cooking bowl.
Make sure that the condensation collector is properly positioned behind the appliance and that the flow channel is not blocked. Check that the filling is not excessive and that the food does not expand. Some ingredients (such as cream, milk, wine, etc.) are sensitive and may cause overfilling. Be sure to follow the ratio indicated in the instructions.
Make sure that the power cable is connected to both your device and the mains power supply. Check that the device is not in standby mode by pressing the OK button. If the problem persists, take your device to an authorized service centre.
If an error screen appears on the product please follow the instructions indicated. If necessary, you can refer to your product's manual for more information.
The pot can be washed in the dishwasher as it is safe to be immersed. However, some detergent products contain elements that are more or less aggressive to metals. This grey residue is the reaction of the metal with the product.
We recommend liquid or gel detergents, which are softer.
The coating of the pot is not altered. To restore the original appearance: using a sponge and a mixture of hot water and white vinegar, clean and then rinse the pot thoroughly. Our advice: for greater satisfaction over time of your pot, we recommend manual washing with a mild detergent.
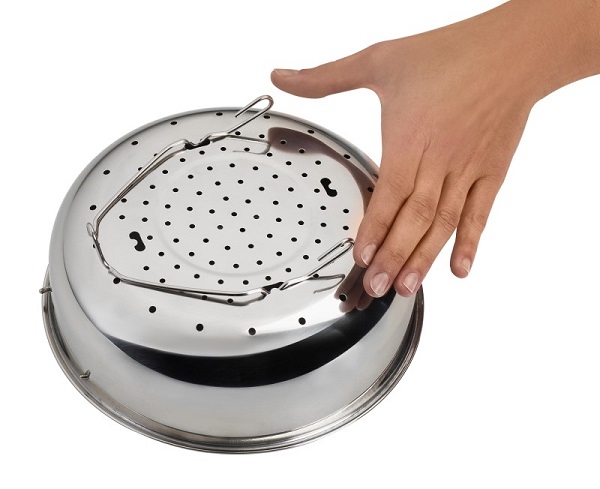
The grid can be placed in the bowl: • either in low position to raise your food for better air circulation. • either in high position to have 2 cooking levels, one at the bottom of the bowl, and one on the grid.
There are recipes specially written with the 2in1 grid accessory directly in the app. When searching, you can filter based on the accessory. You can also use the grid for manual cooking without any problem.
We advise you to let the grid cool before handling it, or to use potholders to take it from the bowl. If the grid is still hot, place it on a heat-resistant surface.
6 jars set (ref. XA606000): You can place 4 jars underneath and 2 jars on top. Be careful to place the two upper jars towards the front to prevent them from tipping over or hindering the lid from closing.
8 jars set (ref. XA6140E0): You can place the 8 jars with the 2 supports of 4 jars one on top of the other in the bowl.
We recommend that you let the containers cool before handling them, or use oven mitts to remove them from the bowl. If the containers are still hot, place them on a heat-resistant surface.


 Cookies are used for audience measurement and personalization to help us improve your use of the product.