TEFAL Dual Easy Fry & Grill Air fryer 8.3 L Coal Grey
Dual Easy Fry & Grill Air fryer 8.3 L Coal GreyDouble the cooking possibilities in our dual air fryer with 2 different sized drawers.
2 drawers, 2 sizes,1 air fryer and grill
Make single or double portions and SYNC the finish
Cook 40% faster* and save on your energy bills**
Get creative in the kitchen with 8 ways to cook
Full meals ready in as little as 15 minutes
Get cooking right away – no preheat needed!
Grill indoors with 98% less smoke***
Cook your favourites with 99% less added fat***
Skip the washing-up with dishwasher-safe parts
Rely on 15-year repairability at a fair price
*40% faster cooking with less energy than a conventional oven; external test cooking 1000g of frozen French fries, compared to a Tefal convection oven. | **Up to 70% energy saving with air fryers by Tefal vs conventional oven Energy Class A. Tests conducted in 2022 on frozen fries. | ***Up to 98% less smoke than a classical grill. External test completed in 2021. Test based on beef steak of 150g, grill function, well cooked, compared to our Tefal classical grill. | ****99% less added fat: 700g of fresh fries cooked with 8ml of oil vs traditional deep frying with 2L.
Double the cooking possibilities in our dual air fryer with 2 different sized drawers.
Enjoy single and dual zone cooking in one sleek appliance with Easy Fry Dual, Tefal’s dual air fryer and grill. Unlike most double air fryers, Easy Fry Dual has two different sized drawers – a 5.2L and a 3.1L – that you can use independently to meet your cooking needs. Dining alone? Just heat the smaller drawer to save energy. Or use both to make a complete meal. The XL drawer fits a whole chicken and the combined 8.3L capacity can feed up to 8. Don’t worry about timings: you can SYNC the drawers, so everything finishes at the same time. It cooks 40% faster* than an oven (no need to preheat it) and it uses up to 70% less energy**. So, you can get dinner ready quicker whilst slashing your bills. 8 programs take the guesswork out of cooking. Air fry irresistibly crispy dishes with 99% less added fat*** thanks to Extra Crisp technology. Grill steaks like a pro on the Sizzling Grill Plate. Roast meats, bake cakes, even dehydrate fruit. Dishwasher-safe parts mean clean-up is easy, too. *40% faster cooking with less energy than a conventional oven; external test cooking 1000g of frozen French fries, compared to a Tefal convection oven. | **Up to 70% energy saving with air fryers by Tefal vs conventional oven Energy Class A. Tests conducted in 2022 on frozen fries. | ***99% less added fat: 700g of fresh fries cooked with 8ml of oil vs traditional deep frying with 2L.
*Compared to a traditional energy class A oven
Essentials
Complete meal in minutes
Double-drawer air fryer with XXL drawer and regular drawer to cook two different foods at once, for a complete family meal ready in one go.
Family-friendly capacity
Use the 5.2 L drawer to cook big ingredients such as a Sunday roast, both drawers for generous portions, or the 3.1 L drawer for when you're alone.
Peace of mind
8 pre-set programs to cook a wide variety of food with no monitoring (fries, chicken, vegetables, fish, dessert, dehydration, manual mode and grill).
Energy and time saving
Dual Easy Fry & Grill consumes up to 70% less energy and cooks up to 40% faster than traditional ovens.* *Tests conducted in 2023 on frozen fries
Extra-Crisp technology
Enjoy crispy golden results with little to no oil—for up to 99% less added fat*. *Tests conducted in 2023 on frozen fries
Free recipe app
Discover the free app with exclusive cooking services and a wide variety of daily recipes ready in under 15 minutes.
Easy to clean
Enjoy effortless clean-up with dishwasher-safe drawers, grill grid and regular grid.
15-year repairability
Designed for easy repair, with low-cost and fast delivery of spare parts for 15 years and more, thanks to more than 6200 repair centers worldwide.
Discover an air fryer and grill all in one, for versatile, healthy cooking day after day
Grill technology
Grill technology and a die cast aluminum grid let you sear any type of food to perfection, with a non-stick coating and built-in drainage—for oil-free cooking and easy cleaning.
Healthy air-frying technology delivers crispy, golden results with little to no oil—and 99% less added fat.*
*700 g of fresh fries cooked with 8 ml of oil vs traditional deep frying with 2 L
You must create an account and log in to your app to access this feature.
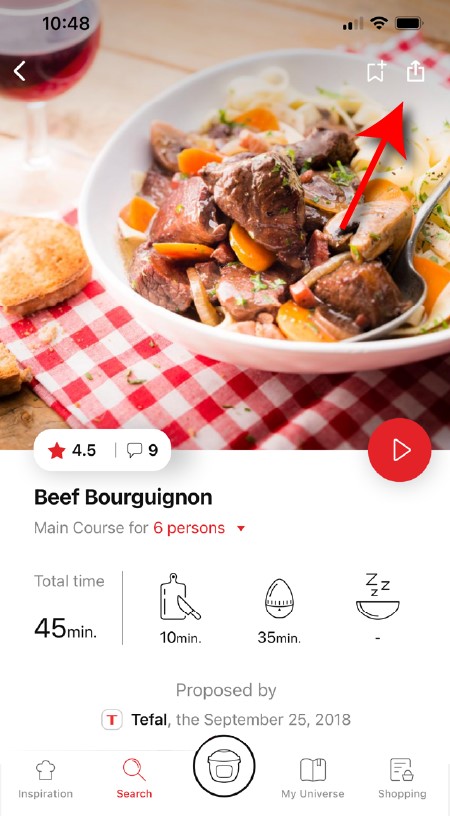
• Go to the recipe you wish to bookmark and select the bookmark logo in the top right corner. • A "My Notebooks" tab appears: select the "My Favorites" location. • The recipe has been added.
The application has rich content and requires a stable Wi-Fi connection to download correctly. If your application does not download correctly, delete it and try to download again when you have a more stable Wi-Fi connection. During initial installation, the download may take several minutes while the application saves all the photos on your Smartphone or tablet.
You need to create an account and sign in to the application in order to access this feature. Click the sharing logo to view the sharing options. You can then choose how you would like to share this recipe.
Your application uses notifications to alert you at the end of cooking times using a beep. If you want to turn off this signal, simply deactivate it in your tablet or Smartphone. You may also disable sounds in the parameter settings for notifications on your telephone or tablet.
Your application uses notifications to alert you when your cooking is finished but also to let you know when new content (information, recipe...) is available. If you wish, you can disable them from your smartphone settings.
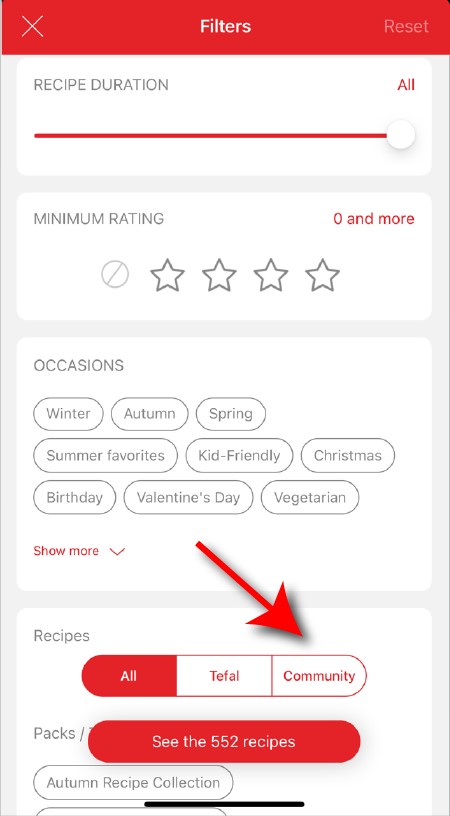
Once you have completed your search, specific filters make it easier for you to find the recipes that meet your needs.
The customizable filter: • Click on "Filter" in order to sort the recipes according to the type of dish (starter, main course, dessert), the time it takes to make the recipe, the minimum rating, their themes (or packs)... • You can also choose to select only the recipes of the brand or the recipes proposed by the community.
Sorting recipes: Once you have made a search, you can sort your recipes by popularity, rating, age or alphabetical order.
When using the search function, select "Filter recipes". In the "Recipes" section, select "Community" only. You will then be able to see the recipes from the community.
You must create an account and log in to your app to access these features.
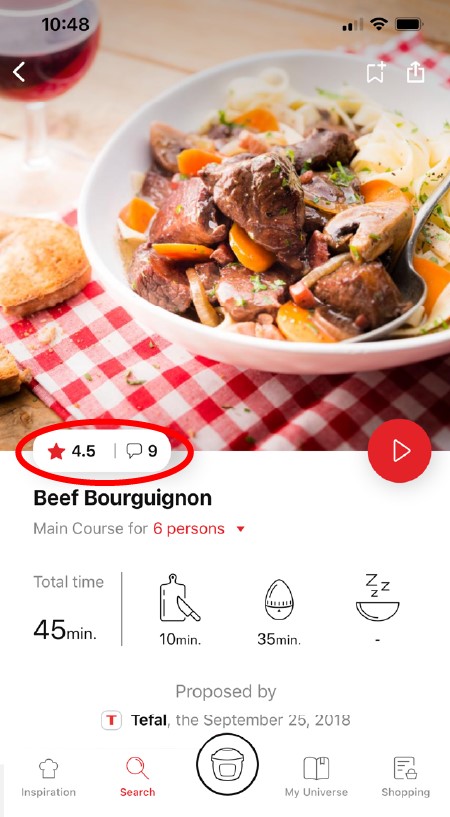
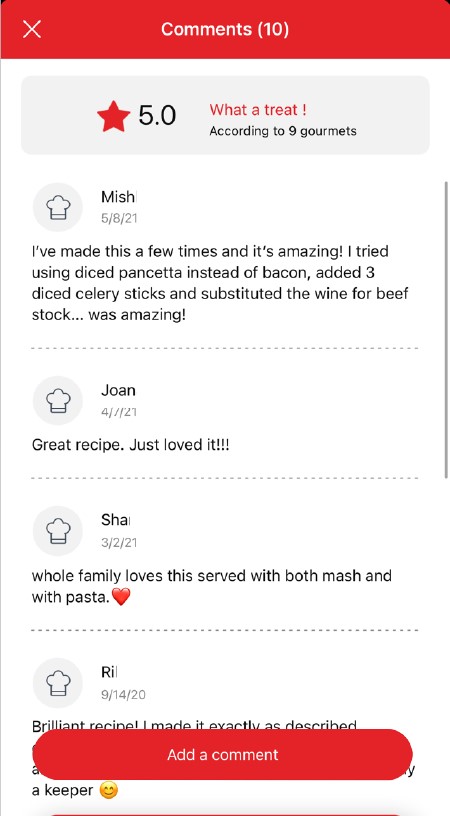
Once logged in, you will be able to read the comments and see the notes that community members have given to the recipe by clicking on the notes/comments area.
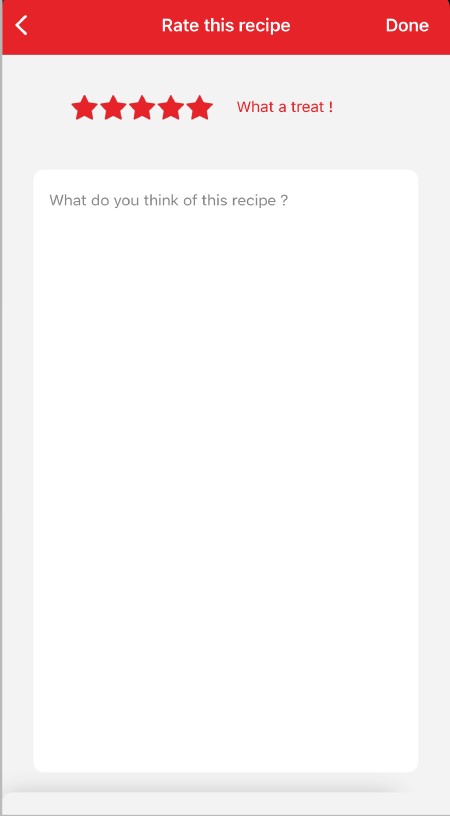
You must create an account and log in to your app to access these features.
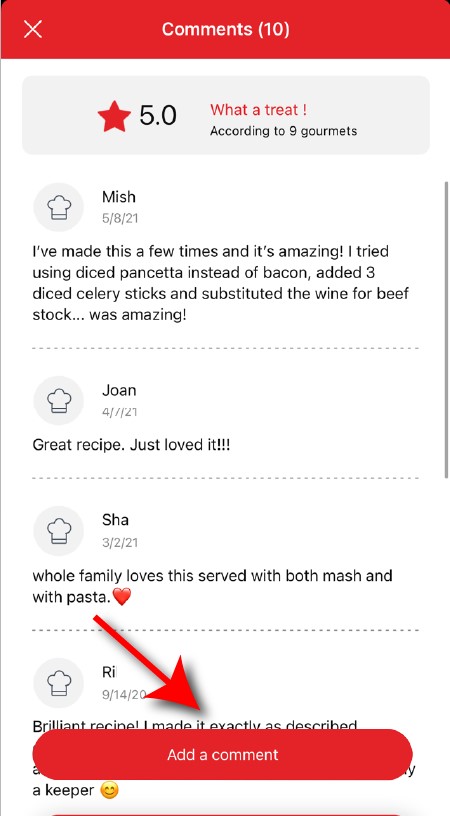
Once logged into your account, you will be able to rate the recipe and add a comment by following the instructions that appear on the screen after clicking on the notes/comments space.
Choose the "My Universe" tab in the navigation bar, then select the booklet you wish to modify or delete. Click on the pencil at the top right of the screen, then select the action you are looking for ("Delete booklet", "Rename booklet" or "Delete recipes").
You must create an account and log in to your app to access this feature.
• Choose the "My Universe" tab in the navigation bar. • There, you will find your recipe booklets and can create new ones by clicking on "New booklet".
It is important to select your product in the app in order to find the right recipes for that product. This way, the app will suggest hundreds of ideal recipes. It will also let you add your accessories and access the associated recipes.
The app is no longer compatible on Android versions 4.4.4 or lower, because of reinforced data security.
As far as possible, we recommend that you update your device to a higher Android version or use another compatible device.
Updates will not only allow you to enjoy a richer experience with new features and compatibility with the latest technology, but will also protect you against possible security vulnerabilities that have been fixed in the latest versions.
• In "My universe", select "My profile". • Click on the image of the registered product. • Click on "Remove the product". The app will then ask you to select a product.
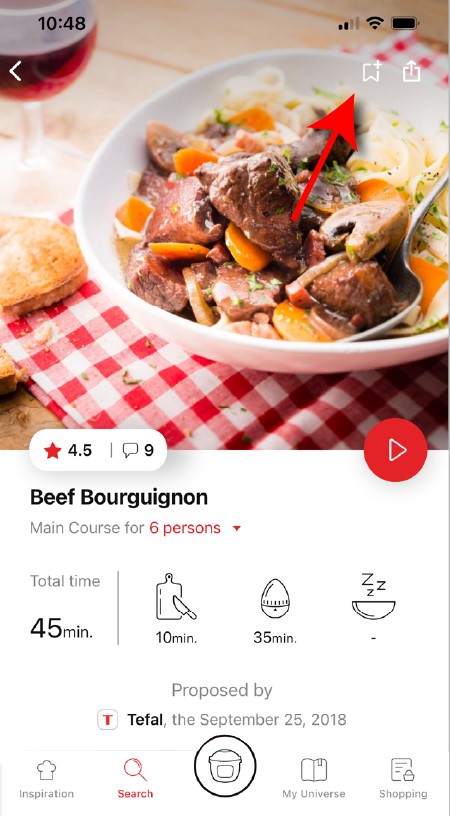
You must create an account and log in to your app to access this feature.
• Go to the recipe you wish to bookmark and select the bookmark logo in the top right corner. • A "My Notebooks" tab appears: select the "My Favorites" location. • The recipe has been added.
You need to create an account and sign in to the application in order to access this feature. Click the sharing logo to view the sharing options. You can then choose how you would like to share this recipe.
The application has rich content and requires a stable Wi-Fi connection to download correctly. If your application does not download correctly, delete it and try to download again when you have a more stable Wi-Fi connection. During initial installation, the download may take several minutes while the application saves all the photos on your Smartphone or tablet.
Your application uses notifications to alert you at the end of cooking times using a beep. If you want to turn off this signal, simply deactivate it in your tablet or Smartphone. You may also disable sounds in the parameter settings for notifications on your telephone or tablet.
Your application uses notifications to alert you when your cooking is finished but also to let you know when new content (information, recipe...) is available. If you wish, you can disable them from your smartphone settings.
You must create an account and log in to your app to access these features.
Once logged into your account, you will be able to rate the recipe and add a comment by following the instructions that appear on the screen after clicking on the notes/comments space.
When using the search function, select "Filter recipes". In the "Recipes" section, select "Community" only. You will then be able to see the recipes from the community.
Once you have completed your search, specific filters make it easier for you to find the recipes that meet your needs.
The customizable filter: • Click on "Filter" in order to sort the recipes according to the type of dish (starter, main course, dessert), the time it takes to make the recipe, the minimum rating, their themes (or packs)... • You can also choose to select only the recipes of the brand or the recipes proposed by the community.
Sorting recipes: Once you have made a search, you can sort your recipes by popularity, rating, age or alphabetical order.
You must create an account and log in to your app to access these features.
Once logged in, you will be able to read the comments and see the notes that community members have given to the recipe by clicking on the notes/comments area.
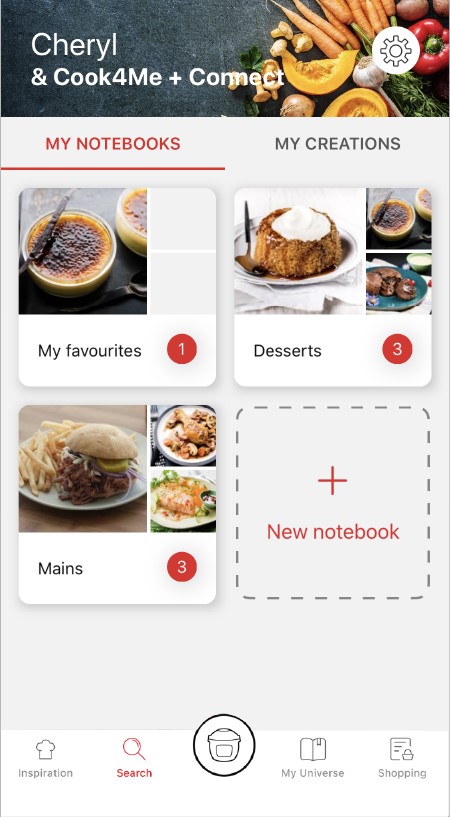
You must create an account and log in to your app to access this feature.
• Choose the "My Universe" tab in the navigation bar. • There, you will find your recipe booklets and can create new ones by clicking on "New booklet".
Choose the "My Universe" tab in the navigation bar, then select the booklet you wish to modify or delete. Click on the pencil at the top right of the screen, then select the action you are looking for ("Delete booklet", "Rename booklet" or "Delete recipes").
It is important to select your product in the app in order to find the right recipes for that product. This way, the app will suggest hundreds of ideal recipes. It will also let you add your accessories and access the associated recipes.
• In "My universe", select "My profile". • Click on the image of the registered product. • Click on "Remove the product". The app will then ask you to select a product.
Wash the cut chips twice in a bowl of water before cooking to remove any excess starch. It is then essential to dry them thoroughly before cooking in a clean, absorbent tea towel and finally patted dry with kitchen paper. If you are cooking frozen chips you do not need to add any oil as these already contain oil and could make the chips soggy. If using the 2 in1 feature (bowl + tray) after the food is cooked on the tray, cook the chips for a further 2-5 minutes after you've removed the tray to make them crispier.
There are many possible reasons: • You may not have used the right variety of potatoes. • The potatoes were insufficiently washed and dried prior to cooking and still contain too much starch. • The chips are too thick. Cut the chips thinner. • You have not used enough oil. Increase the amount of oil. • The filter may be obstructed. Clean the filter. (ActiFry models only)
The size of the chip affects how crunchy or soft it is. The thinner the chips, the more crunchy they will be and conversely, thicker chips will be softer inside. Depending on your taste preferences, you may vary the cooking time and the cut of your chips: thin: 8 x 8 mm/Standard: 10 x 10 mm/Thick: 13 x 13 mm.
For best results, wash the whole potatoes and then sliced potatoes in plenty of water until it runs clear. This allows you to remove as much starch as possible to prevent the chips from sticking together. Dry them thoroughly using a dry, absorbent kitchen towel. The chips should be completely dry before cooking.
You can vary your pleasures and use different oils! Standard oils: olive, rapeseed*, grape seed, corn, peanut, sunflower, soybean* Flavoured oils: aromatic herbs, chilli, garlic, lemon... Special oils: hazelnut*, sesame*, safflower*, almond*, avocado*, argan*... We advise against using walnut oil, which results in a rancid taste after cooking. (* cooking oil according to manufacturer).
In general, we recommend using special chip potatoes. For new potatoes, which are rich in water, we recommend that you cook the chips for a few extra minutes.
The size of the chip affects how crispy or soft it is. The thinner the chips, the more crispy they will be and conversely, thicker chips will be softer inside. According to your wishes, you can vary how you cut your chips: • Thin: 8 x 8 mm • Standard: 10 x 10 mm • Thick: 13 x 13 mm
You can also prepare frozen chips. Since they are pre-cooked, it is not necessary to add oil.
Spread evenly across the basket allowing hot air to circulate evenly. For larger batches, cook in multiple smaller batches to ensure consistent results.
All cooking times are a guide as results may vary. With air fryer cooking you are using a smaller cooking area, and it does not take as long to cook. We would suggest reducing the cooking times and temperature.
Before first use, clean all accessories in hot water using a non-abrasive sponge. Run your Easy Fry empty using the "Manual" mode at 200°C for 45 minutes (without any accessories inside) to eliminate any manufacturing residue and new smell.
Once cooled, use a damp sponge or cloth to clean the inside of the appliance and heating element. It is recommended to clean the removable parts by hand with hot soapy water and non-abrasive sponge.
Do not use any aggressive cleaning agents, scouring sponges or abrasive pads. Do not use any special metal cleaning agents. Never immerse or run the appliance under water.
For more stubborn stains, removable parts can be left to soak in hot soapy water before cleaning with a sponge (scouring powder and scouring pads are not recommended).
To remove lingering smells from the basket after washing with soap and water, rub the cookware with a cut lemon or rinse it with a mixture of water and lemon juice, then rinse thoroughly with water.
You have probably salted your food during the cooking process. Don't salt your food before the end of cooking to avoid scratching. For models using the tray, and to preserve its qualities for longer, do not use any metal utensils.
There could be several explanations: • The appliance is not properly plugged in. • You have not yet pushed the power button or you have pushed it incorrectly. Try again by pushing it firmly. • You have pushed the power button, but the appliance still does not work. Check that the lid is securely closed. • The engines are running but the appliance does not heat up. Take the appliance to an Authorised Service Centre to have it checked.
After following the instructions in the user manual for starting the appliance, make sure that your electrical socket is working by plugging another appliance. If it still does not work, do not try to dismantle or repair the appliance yourself, instead, take it to an approved repair centre.
Yes, this is a genuinely multi-purpose appliance, which can be used to cook a wide range of foods. Your appliance can be used for numerous recipes, from starters to desserts. You can also make crispy chips, tender chicken or even fruit cake…
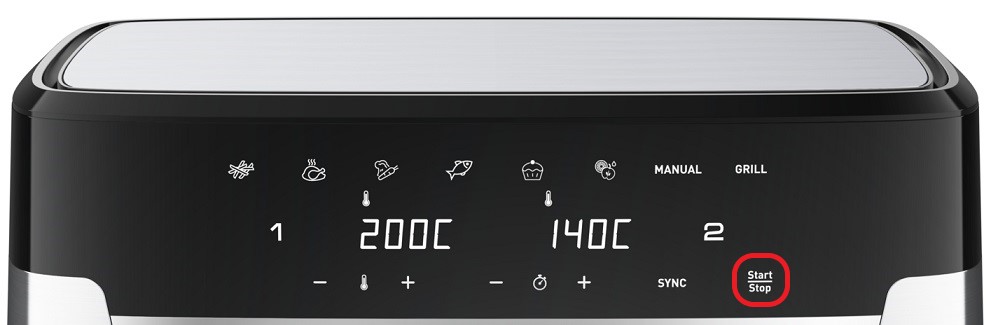
The pre-heat phase only activates when you choose the "Grill" mode (for use only with drawer 1). The default pre-heat time is set at 8 minutes. The pre-heat light stays on for the duration of preheating. "Pre-heat" scrolls across the main display during this time. Once pre-heat has finished, the appliance will display "Add" to fill drawer 1 with what you would like to cook.
The appliance is very versatile and comes with 8 functions, including air fry, bake, roast and grill, making it perfect for a variety of cooking tasks.
An air fryer is a compact appliance that uses rapid air circulation whereas a convection oven circulates hot air more gently using a fan making an air fryer faster and more energy efficient.


 Cookies are used for audience measurement and personalization to help us improve your use of the product.